Reply in your voice.
See only what
matters.
needs you.
is urgent.
An AI copilot that lives inside Outlook — it triages your inbox to surface only the mail that needs you, drafts replies that sound like you, untangles meeting conflicts, and answers questions across your whole mailbox.
Less inbox. More done.
Four focused tools that work together, right where you already read your email.
Priority Inbox
AI reads every message and surfaces only the ones that need you — sorted by urgency. Newsletters, notifications and noise are filtered out. Acknowledge or reply in one click.
Replies in your voice
Drafts that match how you actually write — learned from your past replies to each person, and always in the language of the email. You review and send; nothing goes out on its own.
Meetings, unblocked
Spots calendar clashes and prepares the fix: a free slot inside your working hours plus a note in your voice. For meetings you organise, it can reschedule them and notify everyone.
Ask your mailbox
Chat across your emails and their attachments — PDFs, spreadsheets, docs. Get grounded answers with sources, and download any file straight from the conversation.
Speaks your language
The interface follows your Outlook language — English or Português. And the assistant always replies in the same language as the email it’s answering.
Private by design
EU-resident processing. Email bodies are never stored — only what you choose to keep. You stay in control, and the assistant can’t send mail by itself.
Add it to Outlook, step by step
Set it up once in Outlook on the web — download the add-in file, then point Outlook at it.
Open the add-ins page
In your browser, go to aka.ms/olksideload and sign in with your Microsoft 365 work or school account. The Add-Ins for Outlook dialog opens.
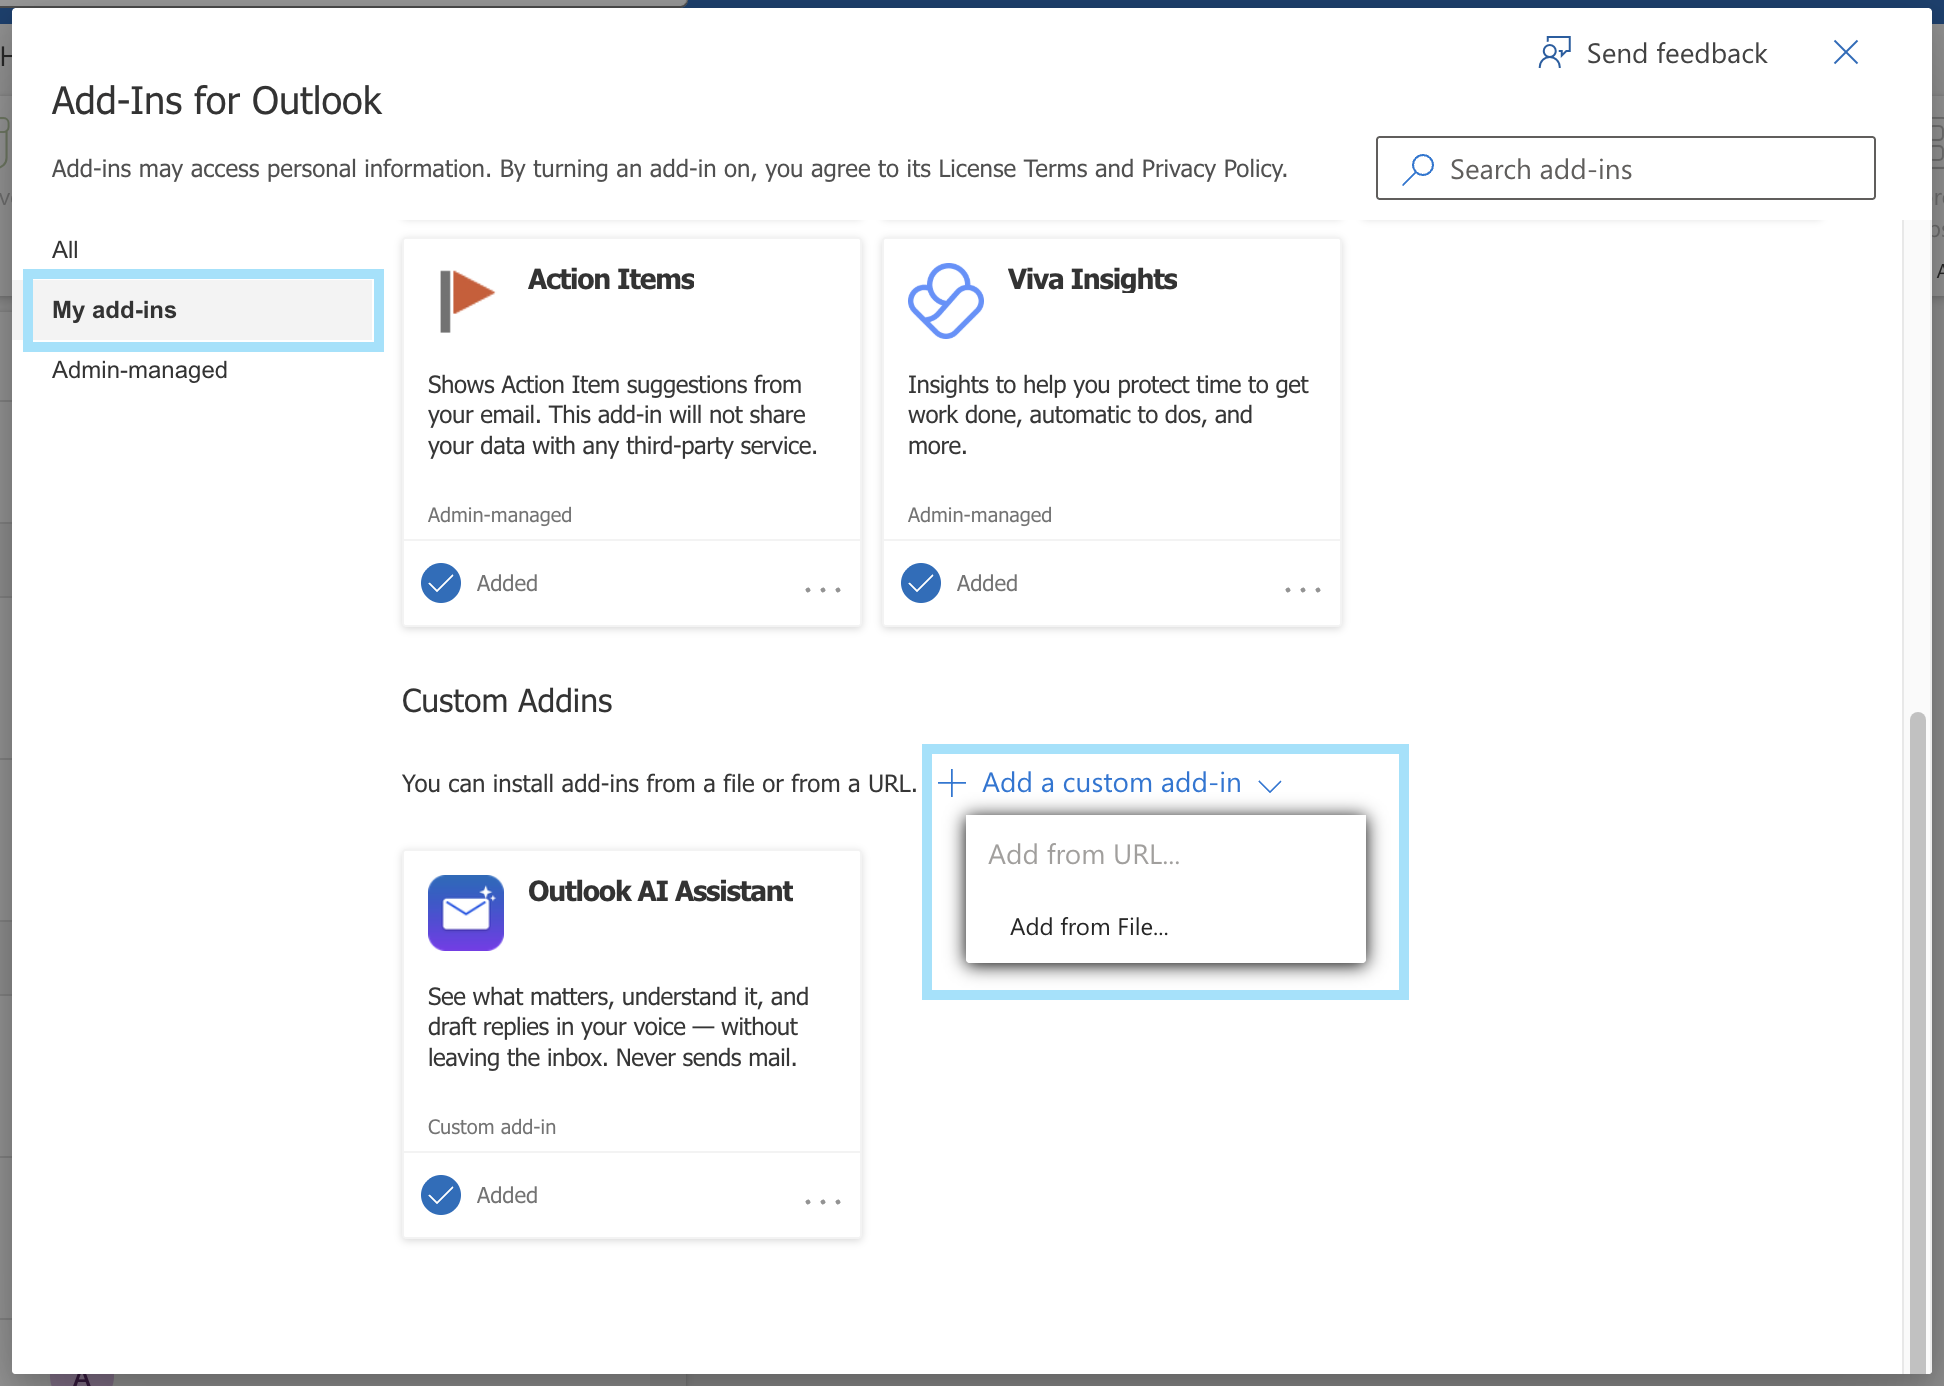
Go to “My add-ins”
In the dialog’s left sidebar, select My add-ins.
Add a custom add-in → from file
Scroll to Custom Addins, click + Add a custom add-in → Add from File…, choose the manifest.xml you downloaded, and confirm Install.
Refresh everything
Reload the browser tab — and restart (or refresh) your Outlook app — so the new add-in syncs through.
Open it on an email
Click any email, then on the toolbar choose Apps / More apps → Outlook AI Assistant.

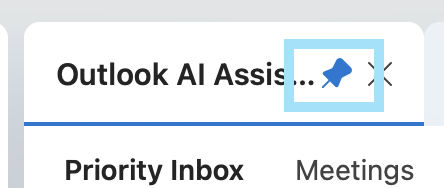
Don’t forget to pin it 📌
In the pane’s top bar, click the 📌 pin next to the title so the assistant stays open as you move between emails — without it, the pane closes every time you switch message.

Diogo Alves
I build practical AI products that get out of your way. Outlook AI Assistant started as a tool to tame my own inbox — a focused copilot that helps you see what matters and respond as yourself, without leaving Outlook. Have feedback or want to talk shop? I’d love to hear from you.